How to Make Coconut Oil: A Simple Step-by-Step Guide
How to make coconut oil is a question that many beauticians and DIY enthusiasts often explore. Coconut oil has gained immense popularity in the beauty industry for its versatile uses and nurturing properties. It acts as a moisturizer, makeup remover, and hair conditioner, making it a staple in beauty routines. But have you ever wondered how you can create your very own coconut oil? In this article, we will take you through the process of making coconut oil from scratch and how you can utilize it in your beauty regimen.

Understanding the Benefits of Coconut Oil
Coconut oil is not just a cooking ingredient; its benefits extend to skincare and hair care as well. Here are some of the notable perks of incorporating coconut oil into your beauty practices:
- Moisturizing Properties: It is ideal for dry skin, offering hydration without clogging pores.
- Antibacterial Benefits: It contains lauric acid, which has antibacterial properties that help in fighting skin infections.
- Hair Nourishing: Coconut oil can improve hair health by adding shine and reducing protein loss.
- Versatile: It can be used in various beauty applications, from body scrubs to hair masks.
Ingredients Needed for Coconut Oil
To make coconut oil, you will need a few key ingredients and equipment:
- Fresh Organic Coconuts: You will need about 2-3 medium-sized coconuts.
- Grater: For shredding the coconut meat.
- Cheesecloth: To strain the coconut milk.
- Cooking Pot or Slow Cooker: For boiling the coconut milk to extract oil.

Step-by-Step Guide: How to Make Coconut Oil
Now that you have your ingredients, lets delve into the process of making coconut oil:
Step 1: Preparing the Coconuts
Start by cracking open the coconuts. You can use a hammer or a cleaver to break them open. Once open, collect the coconut water and set it aside for later use. Now, carefully remove the coconut meat from the shell using a knife.
Step 2: Grating the Coconut Meat
Using a grater, shred the coconut meat into fine pieces. The smaller the pieces, the more efficient the extraction process will be. Once shredded, you should have about 3-4 cups of grated coconut.
Step 3: Extracting Coconut Milk
Place the grated coconut in a large mixing bowl and add 2 cups of hot water. Mix well to create a slurry. Using the cheesecloth, strain this mixture into another bowl to extract the coconut milk. Squeeze gently to remove as much liquid as possible.
Step 4: Cooking the Coconut Milk
Pour the extracted coconut milk into a cooking pot or slow cooker. Cook this over low to medium heat while stirring frequently to prevent burning. You will notice the milk start separating, and the oil will begin to surface after some time.
Step 5: Collecting the Coconut Oil
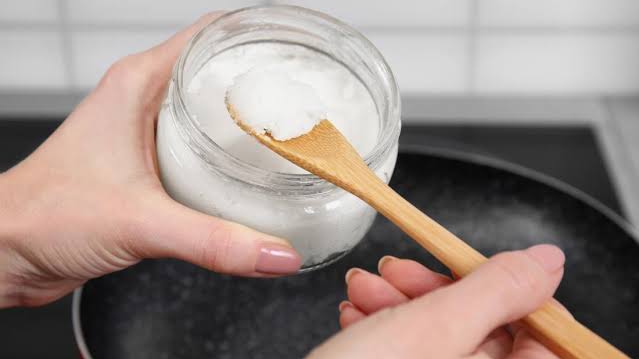
Once the coconut milk has reduced significantly, you will see a clear oil layer forming on top. You can continue cooking until most of the liquid has evaporated, and you are left with pure coconut oil. Let the mixture cool before transferring it to a jar for storage.

Utilizing Coconut Oil in Your Beauty Regimen
Now that you know how to make coconut oil, lets talk about ways you can incorporate it into your beauty routine:
- Moisturizer: Apply it on your skin after bathing for deep hydration.
- Makeup Remover: Use coconut oil to remove makeup gently and effectively.
- Hair Treatment: Apply it as a hair mask before washing your hair for added moisture.

Storing Your Homemade Coconut Oil
To extend the shelf life of your coconut oil, keep it in an airtight container and store it in a cool, dark place. Homemade coconut oil can last up to 6 months when stored properly.
Frequently Asked Questions
Q: Can I use dried coconut to make coconut oil?
A: While fresh coconut is ideal for making high-quality coconut oil, you can use dried coconut (copra) as well; however, the final product may not be as nutritious.
Q: What is the best way to apply coconut oil to my skin?
A: Warm a small amount in your hands and then massage it into your face or body in circular motions.
Q: Is homemade coconut oil better than store-bought?
A: Homemade coconut oil is often fresher and free from preservatives, making it a great natural option.
Additional Resources
For more tips and tricks on maintaining a clean and healthy kitchen environment while working with your beauty products, you can check out kitchen cleaning advice.
If you're interested in other oils and their benefits, take a look at olive oil benefits and explore how these can further enhance your beauty products and practices.
As an Amazon Associate, I earn from qualifying purchases.

